
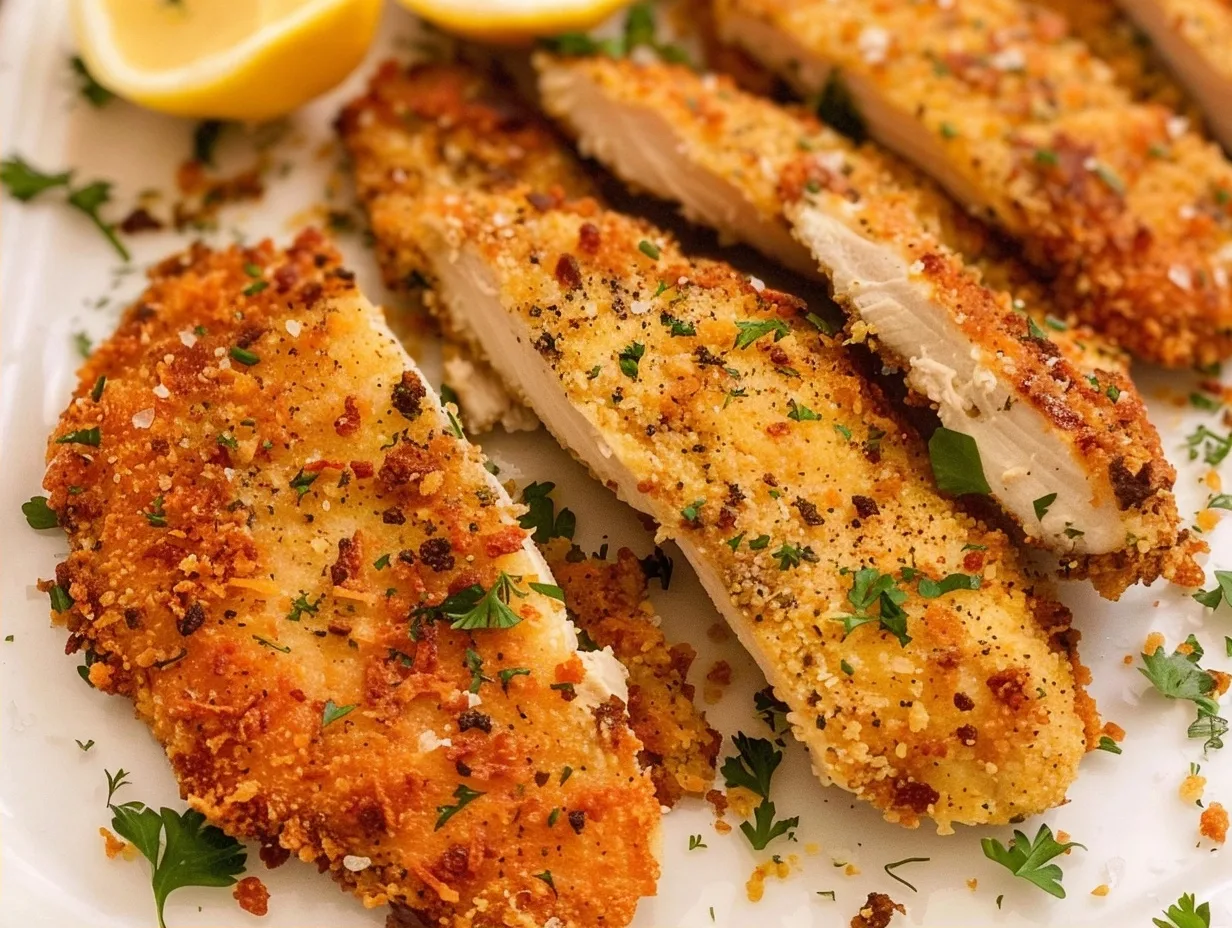
Oven baked chicken cutlets are a superior alternative to fried versions, offering a golden, crispy texture without the excess oil. This classic dish features thin, tender breasts coated in savory, seasoned panko breadcrumbs for a satisfying crunch. Home cooks appreciate this method for its simplicity and reliability, making it an ideal choice for busy weeknights or casual dinners. You will consistently achieve restaurant-quality results by following these precise techniques in your own kitchen.
Recipe Overview
| Metric | Details |
|---|---|
| Prep Time | 15 minutes |
| Cook Time | 21 minutes |
| Total Time | 36 minutes |
| Servings | 4 servings |
| Difficulty | Easy |
| Cuisine | American |
Why This Recipe Works
This recipe works because the combination of a high-heat bake followed by a quick broil mimics the texture of deep-frying perfectly. Panko breadcrumbs provide a larger surface area for heat to crisp up, ensuring that every bite delivers a satisfying crunch. The parmesan cheese adds a layer of umami that elevates the chicken beyond a basic breaded coating.
I have tested this method extensively to ensure the chicken remains juicy rather than drying out during the baking process. By pounding the breasts to an even thickness, the meat cooks uniformly. You never have to worry about the edges being burnt while the center remains raw. This approach guarantees professional results for home cooks of any skill level.
Ingredients
| Quantity | Ingredient | Notes/Alternatives |
|---|---|---|
| 1 lb | Thin chicken breasts | Use regular breasts if cut and pounded thin |
| 1 cup | Seasoned Panko | Use gluten-free panko for dietary needs |
| 1/3 cup | Grated Parmesan | Use Pecorino Romano for a sharper taste |
| 1/2 cup | All-purpose flour | Almond flour works for low-carb variations |
| 2 large | Eggs | Whisk well to ensure even coating |
| 1 tsp | Garlic powder | Fresh minced garlic may burn; stick to powder |
| 1/2 tsp | Dried parsley | Fresh herbs can be used as a garnish |
| 1/2 tsp | Salt | Adjust based on saltiness of breadcrumbs |
| 1/4 tsp | Black pepper | Freshly cracked is always best |
| To taste | Olive oil spray | Essential for achieving the golden brown color |
Step-by-Step Instructions
Preparation Phase
- Set your oven to 400 degrees Fahrenheit to preheat while you prepare the ingredients.
- Place the chicken breasts on a clean cutting board and pound them with a meat mallet until they reach a uniform 1/4 inch thickness.
Dredging Phase
- Add the eggs to a shallow bowl and whisk them until the yolks and whites are fully combined.
- Place the flour into a separate shallow bowl.
- Combine the breadcrumbs, parmesan cheese, garlic powder, dried parsley, salt, and black pepper in a third shallow bowl.
- Dip each chicken cutlet into the flour, then the eggs, and finally the seasoned breadcrumb mixture to ensure an even coating.
Baking Phase
- Arrange the breaded cutlets on a baking sheet lined with parchment paper to prevent sticking.
- Spray the tops of the cutlets generously with olive oil spray to promote browning.
- Bake the chicken for 10 minutes, then flip each piece carefully.
- Bake for an additional 8 minutes before finishing under the broiler on high for 2-3 minutes until golden and crispy.
Chef Tips for Perfect Results
- Ensure the chicken is dry before starting the dredging process so the flour adheres evenly to the surface.
- Pound the chicken as thin as possible to significantly reduce total cook time and improve texture.
- Use a wire rack on top of the baking sheet if you prefer extra airflow for crispier bottoms.
- Watch the broiler closely, as the parmesan cheese can transition from golden to burnt in under 60 seconds.
- Let the chicken rest for 3 minutes after removing it from the oven to lock in the juices.
Common Mistakes to Avoid
- Failing to pound the chicken leads to uneven cooking where the thin parts dry out before the thick parts are done.
- Skipping the olive oil spray results in dry, pale breadcrumbs that lack the desired crunch.
- Crowding the baking sheet creates steam rather than dry heat, which makes the breading soggy.
- Over-baking the chicken makes the protein tough, so use a meat thermometer to ensure it reaches 165 degrees Fahrenheit.
Variations and Substitutions
| Ingredient | Substitution | Impact on Flavor |
|---|---|---|
| Parmesan | Pecorino Romano | Adds a saltier, tangier profile |
| Panko | Crushed Cornflakes | Provides a lighter, crunchier texture |
| Garlic Powder | Onion Powder | Results in a sweeter, milder aroma |
Frequently Asked Questions
Can I use gluten-free breadcrumbs for this recipe?
Yes, you can substitute standard panko with gluten-free alternatives to make this dish safe for those with sensitivities. Ensure the gluten-free breadcrumbs are processed into a coarse texture to mimic the crunch of panko.
How do I know when the chicken is fully cooked?
The chicken is fully cooked when an internal meat thermometer inserted into the thickest part reads 165 degrees Fahrenheit. Visually, the juices should run clear and the breading should be a deep golden brown.
What can I do if the breading is falling off?
Ensure the chicken is completely dry before you begin dredging and that you press the breadcrumbs firmly into the egg-coated surface. If the breading continues to slide off, you may need to chill the breaded cutlets for 15 minutes before baking to set the coating.
Can I prepare these cutlets in advance?
You can bread the chicken earlier in the day and keep it in the refrigerator until you are ready to bake. Do not add the oil spray until you are moments away from placing the tray in the oven.
What is the best way to serve these cutlets?
These cutlets serve perfectly alongside roasted vegetables, a crisp garden salad, or creamy mashed potatoes. Adding a squeeze of fresh lemon juice just before serving brightens the savory flavors and cuts through the richness of the parmesan.
Mastering these oven baked chicken cutlets provides a reliable, nutritious, and crowd-pleasing meal that fits into any weekly rotation. By focusing on uniform thickness and careful browning, you will consistently deliver a crunchy and juicy main course. Embrace this simple technique to elevate your kitchen repertoire with minimal effort and maximum flavor. Enjoy the perfect balance of savory breading and tender poultry in every bite.
PrintOven Baked Chicken Cutlets: Crispy and Healthy

Experience the perfect balance of golden-brown crunch and juicy tenderness with these oven-baked chicken cutlets. By pounding the breasts to an even thickness and utilizing high-quality panko breadcrumbs with a touch of parmesan, you can replicate the texture of deep-fried chicken without the excess oil. This recipe is designed for reliability and professional results, making it an excellent, healthy choice for any busy weeknight dinner.
- Prep Time: 15
- Cook Time: 21
- Total Time: 36
- Yield: 4 servings
- Category: Dinner
- Method: Baking
- Cuisine: American
- Diet: Halal
Ingredients
1 lb thin chicken breasts
1 cup seasoned panko breadcrumbs
1/3 cup grated parmesan cheese
1/2 cup all-purpose flour
2 large eggs, lightly whisked
1 tsp garlic powder
1/2 tsp dried parsley
1/2 tsp salt
1/4 tsp black pepper
Olive oil spray
Instructions
Preheat your oven to 400 degrees Fahrenheit.
Place chicken breasts on a cutting board and pound with a meat mallet until they reach an even thickness.
Set up a breading station with three shallow bowls: flour in the first, whisked eggs in the second, and a mix of panko, parmesan, garlic powder, parsley, salt, and pepper in the third.
Coat each chicken breast in flour, shaking off the excess.
Dip the floured chicken into the egg mixture until fully coated.
Press the chicken firmly into the panko mixture to ensure a uniform crust.
Place breaded cutlets on a wire rack over a baking sheet and coat generously with olive oil spray.
Bake for 18 to 21 minutes, or until the chicken is golden brown and cooked through.
Optionally, broil for 1-2 minutes at the end for extra crispiness.
Notes
Ensure the chicken is pounded to a uniform thickness so all pieces cook at the same rate. Use gluten-free panko if required. Freshly grated parmesan provides better melting and flavor than pre-grated varieties. Store leftovers in an airtight container in the refrigerator for up to 3 days.