Table of Contents
The Crispy Beef Chimichanga is more than just a meal; it is a texture-filled journey through the heart of Tex-Mex comfort. Often described as a deep-fried burrito, this viral classic has captured the hearts of food lovers across the USA. This article synthesizes everything you need to know to recreate this masterpiece in your own kitchen. We will explore the origins of the dish, the essential ingredients that create that signature “crunch,” and professional techniques to ensure your beef remains juicy while the exterior achieves a flawless golden hue. From selecting the right flour tortilla to mastering the art of the fold, this guide provides a comprehensive roadmap for beginners and seasoned home cooks alike.
What Exactly is a Chimichanga?
At its core, a chimichanga is a burrito that has been deep-fried to perfection. Legend has it that the dish was invented by accident in Arizona when a burrito was dropped into a deep fryer. Regardless of its accidental beginnings, the result was a culinary revelation. Unlike a soft burrito, the chimichanga offers a sturdy, flaky crust that shatters upon impact, revealing a molten interior of seasoned shredded beef, melted cheese, and savory beans. It bridges the gap between a snack and a feast, making it a staple in Mexican-American restaurants.
Why This Viral Recipe Works
The popularity of this specific recipe lies in its simplicity and high-impact flavor profile. By using pre-cooked shredded beef, you cut down on active cooking time without sacrificing depth. The combination of cheddar or a Mexican blend ensures a stretchy, gooey cheese pull that contrasts beautifully with the crispy shell. Furthermore, the inclusion of refried beans adds a creamy structural element that prevents the beef from drying out during the frying process. It’s a balanced bite that hits every sensory note: salty, savory, creamy, and crunchy.
Essential Ingredients for Success
To achieve the results seen in our viral photos, quality ingredients are non-negotiable. Using high-quality protein and the right tortilla makes all the difference in the world. Large flour tortillas are essential because they must be fresh and pliable to prevent cracking during the folding process. For the frying stage, a high-smoke point oil like vegetable or canola is best for achieving that golden finish without burning. Finally, a sharp cheddar provides a bold punch, while a Mexican blend offers superior meltability for that perfect interior.
Ingredients List
- 2 cups cooked shredded beef (or chicken for a lighter version)
- 1 cup shredded cheese (cheddar or Mexican blend)
- 1/2 cup refried beans (optional, for creaminess)
- 4 large flour tortillas (burrito size)
- 2 tablespoons melted butter or oil (for sealing/brushing)
- Vegetable oil for frying
- Toppings: Sour cream, guacamole, fresh salsa, and cilantro.
Step-by-Step Instructions
To begin, prepare the filling by tossing your shredded beef with a portion of the cheese in a medium bowl. If you are using refried beans, warm them slightly to make spreading easier. Lay a tortilla flat and spread a thin layer of beans in the center, followed by a generous scoop of the beef and cheese mixture. For a professional fold, tuck the sides of the tortilla over the filling, then roll from the bottom up, keeping it tight to secure the contents. Heat about one inch of oil in a heavy-bottomed skillet to 350°F. Carefully place the chimichanga seam-side down in the hot oil and fry for 2–3 minutes per side until golden brown. Drain on a wire rack for 60 seconds before serving to maintain that maximum crunch.
Tips for a Healthier Air-Fried Version
While deep-frying is traditional, you can achieve a fantastic result in the air fryer for a lighter meal. Simply preheat your air fryer to 400°F. Lightly brush the exterior of your assembled chimichangas with avocado oil or melted butter to help the “browning” process. Place them in the basket seam-side down, ensuring they do not touch to allow for proper air circulation. Air fry for 6–8 minutes, flipping halfway through, until the shell is hard and golden. This method significantly reduces the fat content while retaining a satisfying snap.
Common Mistakes to Avoid
One of the biggest pitfalls is overfilling the tortilla. If there is too much bulk, the tortilla will tear, or the filling will leak into the oil, causing splatters and soggy spots. Another mistake is using cold tortillas which are prone to breaking; a quick 10-second zap in the microwave makes them much more elastic. Lastly, ensure your oil is at the right temperature before frying. Oil that is too cold will soak into the tortilla, making it greasy and heavy rather than light and crispy.
Customizing Your Chimichanga
The beauty of this recipe is its versatility and how easily it adapts to your pantry. For a spicy kick, add diced jalapeños or a spoonful of chipotle in adobo sauce to the beef mixture. If you prefer a “Chimichanga Suizo,” smother the finished product in green enchilada sauce and extra melted cheese after frying. You can also swap the beef for shredded rotisserie chicken or even seasoned black beans and corn for a vegetarian-friendly alternative that still packs a massive flavor punch.
FAQs
Can I make these ahead of time? Yes! You can assemble the chimichangas and keep them in the fridge for up to 24 hours before frying. They also freeze beautifully for up to 3 months if wrapped tightly.
What is the best way to reheat a chimichanga? Avoid the microwave as it makes the shell chewy and soft. Instead, use a toaster oven or air fryer at 350°F for about 5 minutes to restore the original crispiness.
Can I use corn tortillas? Corn tortillas are generally too small and brittle for a traditional chimichanga. Flour tortillas are highly recommended for their elasticity and structural integrity during the rolling and frying process.
Presentation and Side Dishes
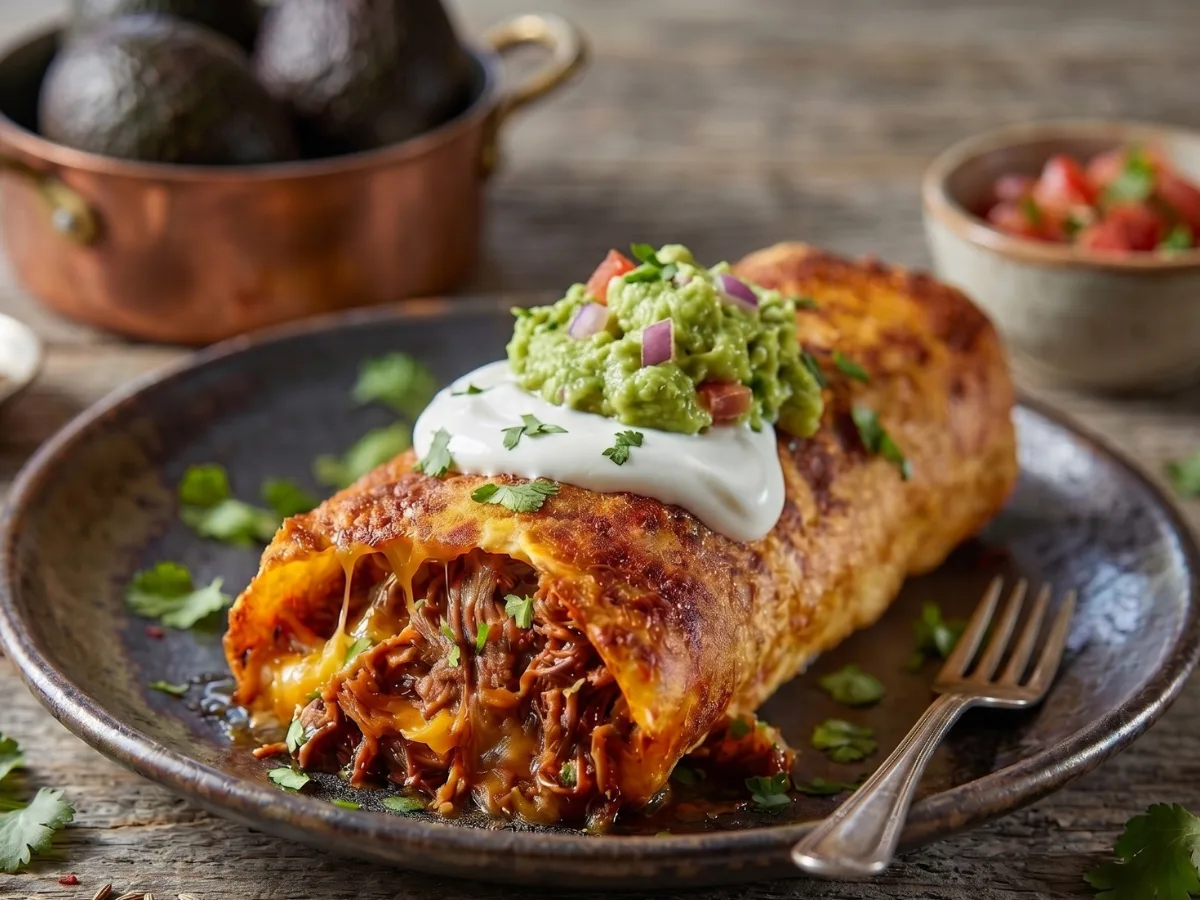
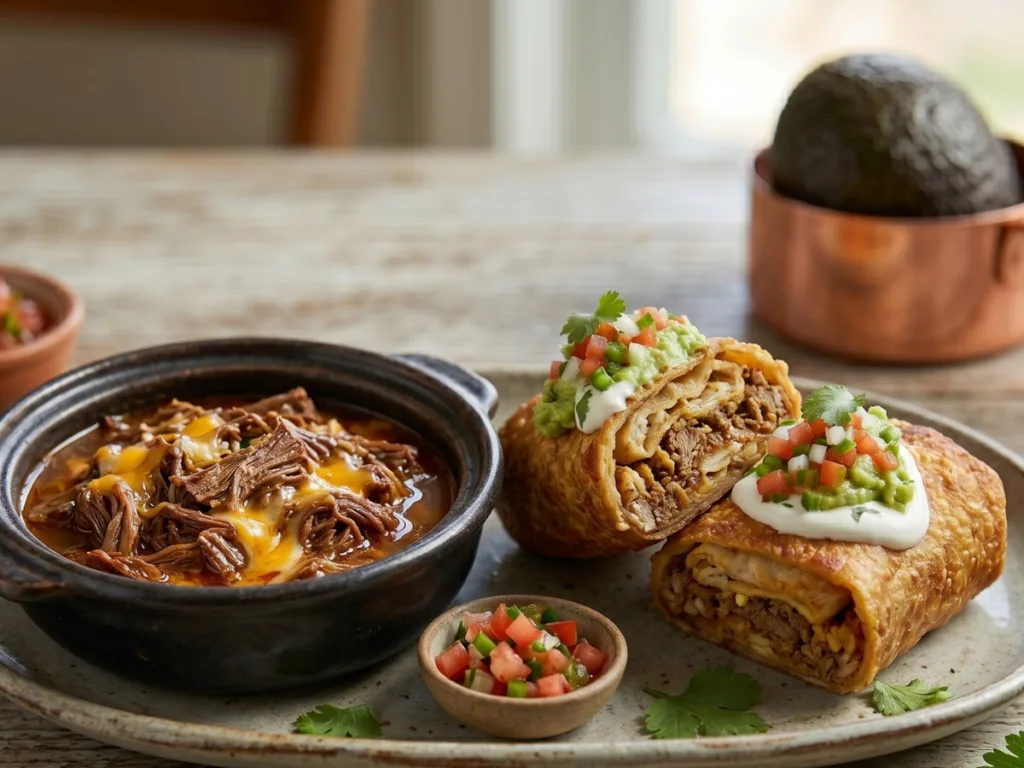
Serve your Crispy Beef Chimichanga topped with a vibrant “flag” of toppings: a dollop of white sour cream, green guacamole, and red tomato salsa. This not only looks professional but adds essential acidity to cut through the richness of the fried shell. Pair it with a side of cilantro-lime rice and smoky black beans to create a complete restaurant-style experience right at home. Adding a few fresh lime wedges on the side provides a bright finish to the plate.
Conclusion: A Masterpiece on a Plate
Mastering the Crispy Beef Chimichanga is a rewarding endeavor for any home cook. By focusing on the quality of your shredded beef and the precision of your frying technique, you can elevate a simple burrito into a world-class meal. Whether you are hosting a festive dinner or simply treating yourself to a viral classic, this recipe guarantees a golden, crunchy result every single time. Grab your tortillas, heat your oil, and enjoy the most satisfying crunch in Mexican cuisine.
Love this recipe? Discover even more!
Explore my Pinterest boards for a world of delicious recipes, fresh ideas, and inspiring flavors. Click here and start pinning your next favorite dish! ➜https://www.pinterest.com/ElitesRecipes/
PrintCrispy Beef Chimichanga Secrets

A viral classic featuring a golden, crunchy flour tortilla stuffed with savory shredded beef, melted cheese, and optional refried beans.
- Prep Time: 10 minutes
- Cook Time: 10 minutes
- Total Time: 20 minutes
- Yield: 4 servings
- Category: Main Course
- Method: Deep-Fried
- Cuisine: Tex-Mex
Ingredients
2 cups cooked shredded beef
1 cup shredded cheese (cheddar or Mexican blend)
1/2 cup refried beans
4 large flour tortillas
2 tbsp vegetable oil (for sealing)
1 quart vegetable oil (for frying)
Toppings: sour cream, guacamole, salsa
Instructions
1.Warm tortillas in microwave for 10 seconds.
2.Spread beans and beef mixture onto center of tortilla.
3.Fold in sides and roll tightly.
4.Heat oil to 350°F in a large skillet.
5.Fry chimichangas seam-side down until golden (2-3 mins per side).
6.Drain on paper towels and serve with toppings.
Notes
For air frying: Brush with oil and cook at 400°F for 8 minutes.
Ensure beef is well-drained to keep the shell crispy.
Works great with leftover pot roast.