
Table of Contents
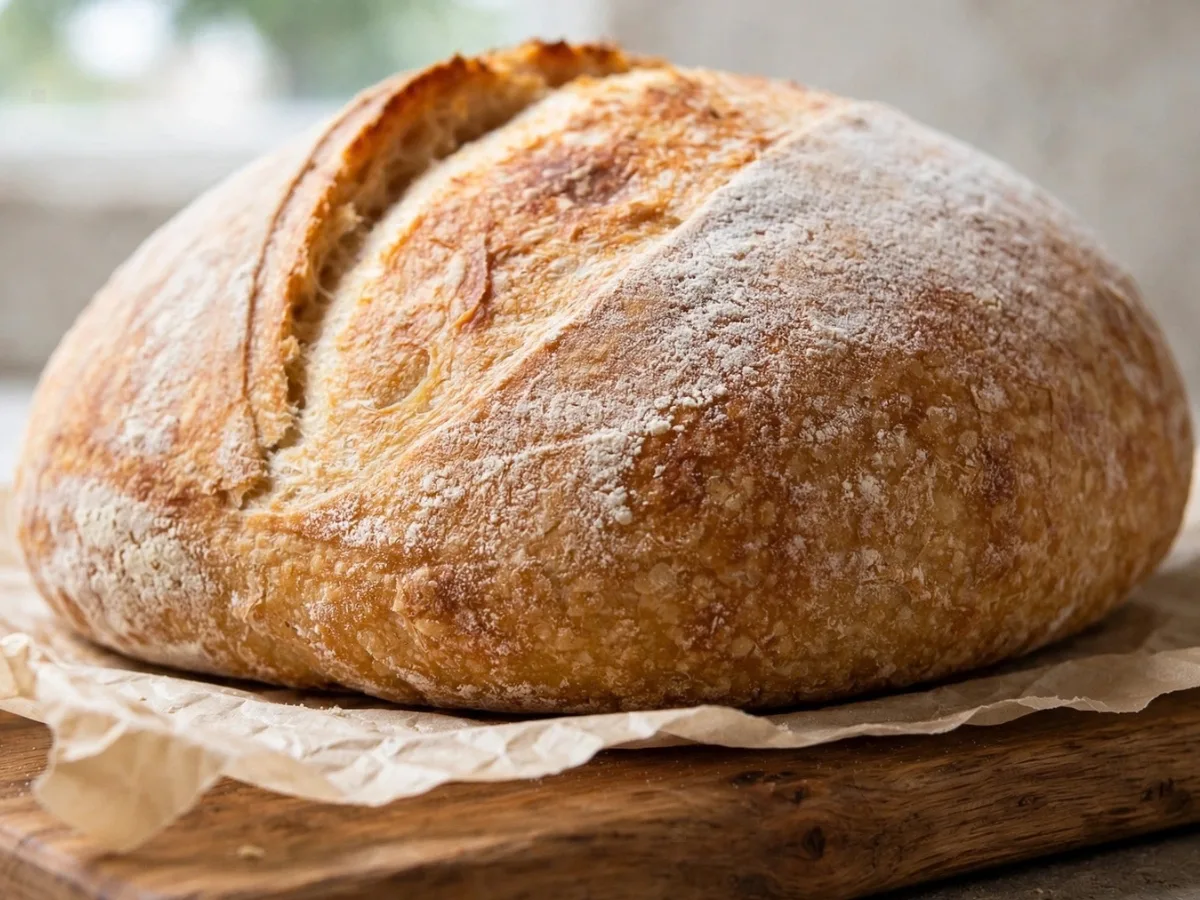
A good sourdough loaf doesn’t require complicated kneading or a long list of ingredients. This Sourdough Bread Recipe uses flour, water, salt, and an active starter to produce a deeply golden crust with a tender, pleasantly chewy interior. Most of the work happens while the dough rests and ferments, making it an approachable method for home bakers learning to work with sourdough.
The process begins with a starter build the night before, followed by mixing, two rises, simple folding and shaping, and baking in a covered Dutch oven. There is no traditional kneading required. More importantly, the instructions focus on how the dough should look and feel, so you aren’t depending entirely on the clock to tell you when your homemade sourdough bread is ready for the next step.
Why This Sourdough Method Works
Sourdough can seem technical because fermentation changes according to starter strength, flour, room temperature, and even the season. This method keeps the process manageable by using a generous amount of ripe starter and maintaining the dough in a comfortably warm environment.
It is also essentially a no-knead sourdough bread method. After combining the ingredients into a shaggy dough, you don’t need to spend 10 or 15 minutes kneading. Fermentation develops the dough while a straightforward folding and shaping technique creates enough surface tension for a rounded artisan-style loaf.
A Dutch oven helps retain moisture released from the dough early in baking. The humid environment delays crust formation, giving the loaf an opportunity to expand before the exterior becomes crisp and golden.
Ingredients You’ll Need
Only four basic components go into the finished dough.
Bread flour: Bread flour’s higher protein content generally provides good strength and structure. Unbleached all-purpose flour can also be used, although the final crumb and dough handling may differ slightly.
Active sourdough starter: The starter should be bubbly and well risen when measured for the dough. This recipe builds more starter than the 100 grams needed, leaving some behind rather than requiring you to scrape the jar completely clean.
Filtered water: Water at about 90°F provides a warm environment for the starter without being excessively hot.
Sea salt: Salt adds flavor and also influences dough strength and fermentation. A scale is particularly useful for measuring the 10 grams accurately.
Because flour is a raw agricultural product, avoid tasting uncooked dough. The CDC recommends baking dough containing raw flour before eating it; see its guidance on raw flour and dough safety for additional food-safety information.
Prepare Your Starter the Night Before
Combine 25 grams mature starter, 75 grams flour, and 75 grams 90°F water in a clean jar. Mix until there are no dry pockets of flour, then loosely cover the jar and leave it at room temperature for 8–12 hours.
By morning, look for activity rather than relying solely on elapsed time. The starter should have expanded significantly, ideally doubling, with plenty of bubbles throughout. A starter that has barely risen may lead to a much slower bulk fermentation and a dense loaf.
This overnight build isn’t a simple sourdough starter recipe for establishing a starter from flour and water from scratch. It is a way of feeding an existing mature starter so that it is active enough to raise bread.
How to Make Sourdough Bread
Mix the Dough
Place 100 grams of ripe starter and 300 grams of 90°F water in a large mixing bowl. Stir until the starter disperses through the water.
Add 500 grams bread flour and 10 grams sea salt. Mix with a spoon, then your hands, just until no obvious dry flour remains and a sticky, shaggy ball forms.
Don’t continue adding flour merely because the dough feels sticky. Extra flour changes the dough’s hydration and may produce a heavier crumb.
Let the Dough Bulk Ferment
Cover the bowl and place it in the oven with only the oven light switched on. Allow the dough to ferment for approximately 5–6 hours, or until it becomes noticeably puffy and roughly doubles in volume.
Temperature matters here. Aim for a gently warm environment around 80–85°F. Oven lights differ considerably, so check the actual environment rather than assuming the light creates the correct temperature. If the bowl itself begins feeling warm, crack the oven door or switch the light off.
A properly fermented dough should look inflated and feel aerated. When gently pressed, an indentation should slowly begin to recover.
Shape the Loaf
Lightly flour the counter and turn out the dough with the smoother surface facing down.
Pull the top edge outward gently and fold it toward the center. Repeat with the bottom and both sides, then pinch the dough together. Repeat the folds once more.
Turn the loaf seam-side down. With cupped hands, rotate and gently drag it against the counter to create surface tension. Stop when the exterior looks smooth and taut while the dough remains soft and pillowy.
Avoid aggressive handling. The goal is to organize and tighten the dough without pressing out all the gas generated during fermentation.
Proof the Shaped Dough
Flour a bread basket generously. Set the loaf inside seam-side up, dust it lightly with flour, and cover.
Return it to the warm oven for approximately 2–3 hours. The shaped loaf should become considerably fuller, soft, and airy.
Times in any Sourdough Bread Recipe are estimates because fermentation is biological rather than fixed. A vigorous starter in an 85°F environment can work faster than a less active starter in a cooler kitchen. Watch the dough as well as the clock.
Score and Bake Your Artisan Sourdough Bread
Remove the proofing dough before turning on your oven. Preheat to 450°F.
This method intentionally does not preheat the Dutch oven.
Place parchment on the counter and carefully invert the basket so that the dough lands seam-side down. Using a bread lame or very sharp knife, make a decisive lengthwise score approximately ½ inch deep.
Lift the loaf by the parchment and lower it into the Dutch oven. Cover, place it in the oven, and immediately reduce the temperature to 425°F.
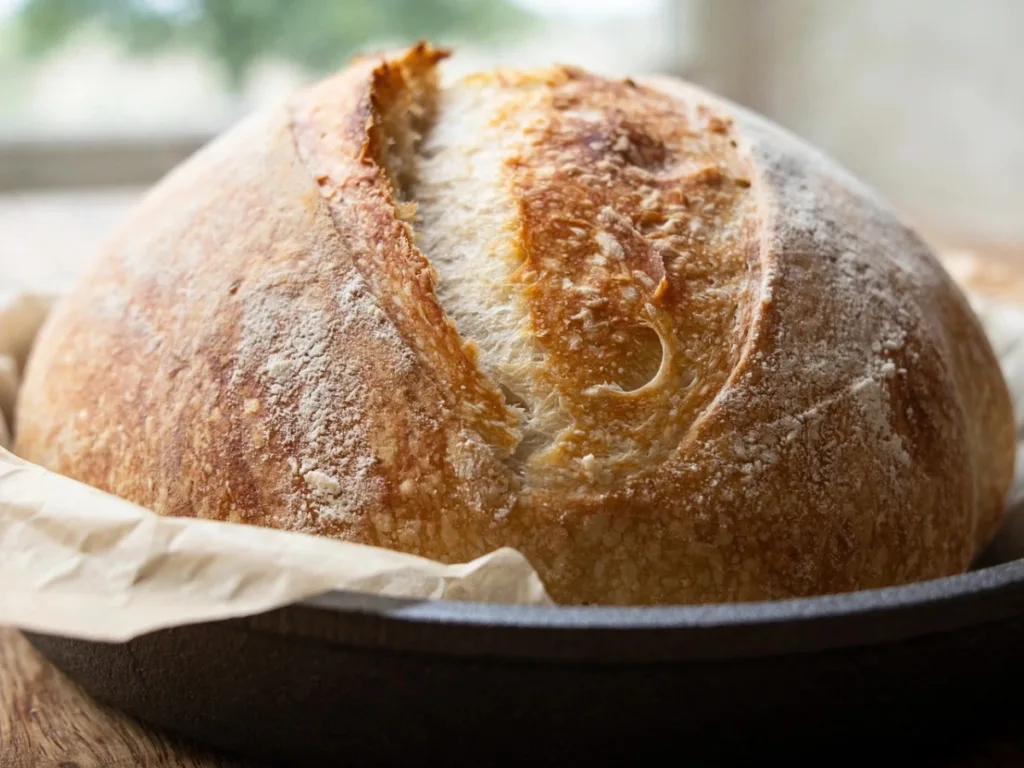
Bake covered for 40 minutes. Remove the lid and continue baking for another 5–10 minutes, until the crust develops a rich golden-brown color.
Transfer the bread to a cooling rack and wait at least 2 hours before slicing. The loaf should reach approximately 190–205°F internally when baked. Cooling isn’t simply an exercise in patience: the crumb continues to set as heat and moisture redistribute inside the loaf.
Tips for Better Homemade Sourdough Bread
For a more consistent loaf, weighing ingredients is one of the most useful changes a beginning baker can make. Volume measurements of flour can vary substantially depending on how the measuring cup is filled.
Use the dough’s condition to confirm fermentation. The 5–6 hour bulk rise and 2–3 hour final proof are useful starting points, but they cannot account for every starter or kitchen temperature.
Score confidently rather than slowly sawing at the surface. A clean opening provides a controlled location for the expanding dough.
Finally, don’t slice a steaming-hot loaf. Cutting too early can leave the crumb gummy and compressed even if the bread was thoroughly baked.
If you want to experiment after mastering this beginner loaf, try this sourdough loaf with olive oil and egg. For a different fermentation schedule, this one-day sourdough bread recipe offers another approach.
How to Store Sourdough Bread
Once completely cool, keep the loaf at room temperature in a bread bag, bread box, or other suitable bread container. For the best crust and texture, enjoy it during the first few days.
For longer storage, freezing is preferable. Slice the completely cooled loaf and place the slices in a freezer-safe bag or container, removing as much excess air as practical. Individual frozen slices can go directly into a toaster, which makes freezing particularly convenient.
If the crust softens after storage, briefly warming the loaf or slices in the oven can help restore some crispness.
Sourdough Troubleshooting
A dense loaf often points to fermentation. If the starter wasn’t sufficiently active or the dough hadn’t become airy before shaping, the bread may not rise as expected.
If the loaf spreads when turned out of the basket, the dough may have fermented too far or may not have developed enough tension during shaping. A very warm proofing environment can accelerate this problem.
A pale, soft crust usually benefits from more uncovered baking. Conversely, if the exterior becomes dark before the center is adequately baked, verify your oven temperature with a separate oven thermometer.
Some stickiness during mixing is expected. Continually adding flour to make the dough feel like conventional kneaded bread can change the intended texture.
Frequently Asked Questions
Is this a good sourdough bread recipe for beginners?
Yes. The ingredient list is short, no conventional kneading is required, and the method provides visual and tactile clues for fermentation. A healthy, established starter is still essential for reliable results.
Can I use all-purpose flour instead of bread flour?
Yes. Use unbleached all-purpose flour as provided in the recipe. Since flour brands absorb water differently, the dough may feel somewhat softer or behave differently from one made with bread flour.
Why didn’t my sourdough bread rise?
Check your starter first. The overnight build should show clear bubbling and strong expansion before you use it. A cool environment can also make the stated fermentation times considerably longer.
Do I have to preheat the Dutch oven?
Not for this particular method. The oven itself is preheated to 450°F, but the recipe places the shaped loaf in a room-temperature Dutch oven before baking.
Can sourdough bread be frozen?
Yes. Cool the bread fully first, then freeze the loaf or individual slices in freezer-safe packaging. Slicing before freezing makes it easy to remove only what you need.

Easy Sourdough Bread Recipe for Beginners
A beginner-friendly homemade sourdough bread with a crisp golden crust and tender, chewy crumb, made with active starter and no traditional kneading.
- Prep Time: 25 minutes
- Cook Time: 45-50 minutes
- Total Time: 17-24 hours including fermentation and cooling
- Yield: 1 loaf
- Category: Bread
- Method: Baking
- Cuisine: American
- Diet: Vegetarian
Ingredients
Starter Build:
25 grams mature sourdough starter
75 grams unbleached bread flour or all-purpose flour
75 grams water, 90°F
For the Dough:
100 grams ripe sourdough starter
300 grams filtered water, 90°F
500 grams white bread flour or unbleached all-purpose flour
10 grams sea salt
Instructions
1. Mix 25g starter, 75g flour, and 75g water. Cover loosely and ferment 8-12 hours until bubbly and doubled.
2. Combine 100g ripe starter with 300g warm water. Add 500g flour and 10g salt; mix into a shaggy dough.
3. Cover and rise in a warm 80-85°F environment for 5-6 hours, until puffy and approximately doubled.
4. Turn onto a lightly floured counter, fold the four sides toward the center twice, then shape into a taut ball.
5. Place seam-side up in a floured proofing basket. Cover and proof 2-3 hours until light and airy.
6. Remove dough and preheat oven to 450°F. Turn dough onto parchment and score about 1/2 inch deep.
7. Transfer to an unheated Dutch oven, cover, and place in oven. Reduce temperature to 425°F.
8. Bake covered for 40 minutes, then uncovered for 5-10 minutes until golden brown.
9. Cool on a rack for at least 2 hours before slicing.
Notes
Fermentation times can vary with starter strength and temperature.
Keep the proofing environment around 80-85°F.
Do not preheat the Dutch oven for this method.
Allow the loaf to cool completely before slicing.