Table of Contents
There is something truly magical about a dessert that requires zero oven time yet delivers a level of indulgence that rivals the most complex pastries. If you are looking for the ultimate crowd-pleaser that balances salty, sweet, and creamy textures, this cake is exactly what your kitchen needs. We have all been there: guests are coming over, the house is warm, and the last thing you want to do is hover over a hot stove or preheat the oven to 350 degrees. This recipe solves that dilemma perfectly, offering a sophisticated, layered look that suggests you spent hours in the kitchen, when in reality, the refrigerator did all the heavy lifting.
The beauty of a peanut butter icebox cake lies in its transformative nature. By layering crisp graham crackers with a velvety, whipped peanut butter filling, a chemical reaction of sorts occurs during the chilling process. The crackers absorb just enough moisture from the cream to become soft and cake-like, while the filling sets into a sturdy yet light mousse. It is the kind of dessert that satisfies the deepest cravings for something rich, yet remains refreshing enough for a summer afternoon. Whether you are a seasoned baker or someone who considers boiling water a culinary achievement, this peanut butter icebox cake is designed for success.
In this guide, we will walk through the nuances of creating the perfect layers, ensuring your peanut butter icebox cake has the ideal structural integrity and flavor profile. We will dive into the science of why high-quality creamy peanut butter matters and how to achieve those signature clean slices that look so beautiful on a plate. This cake is more than just a recipe; it is a reliable staple for your dessert repertoire that will have everyone asking for seconds. Get ready to discover your new favorite no-bake obsession as we explore the layers of this incredible cake.
Recipe Overview
- No-Bake Ease: No need to turn on the oven; the refrigerator does the work.
- Perfect Texture: Layers of graham crackers soften into a melt-in-your-mouth cake consistency.
- Crowd Favorite: Combines the iconic duo of peanut butter and chocolate for universal appeal.
- Make-Ahead Friendly: Actually tastes better the next day, making it perfect for stress-free hosting.
- Simple Ingredients: Uses pantry staples that are easy to find at any local grocery store.
Quick Recipe Facts
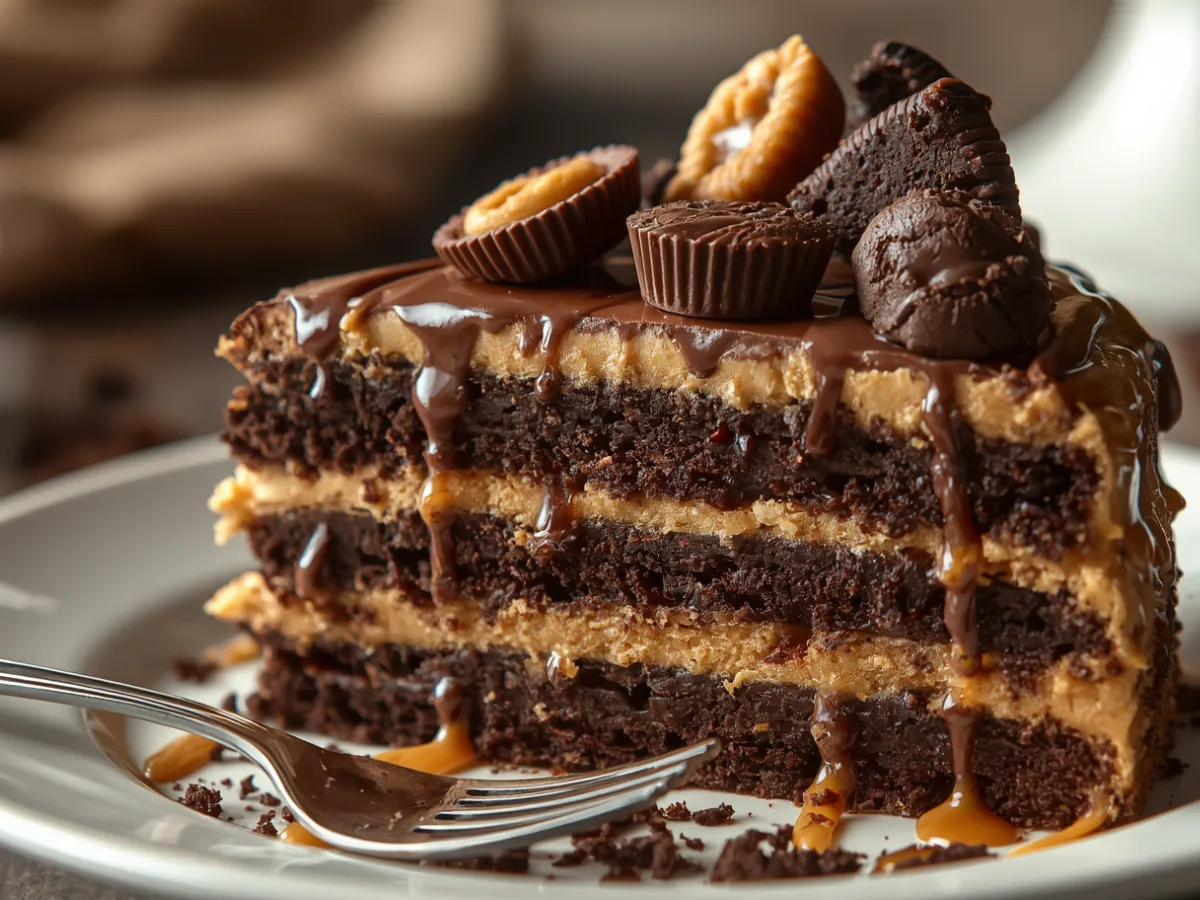
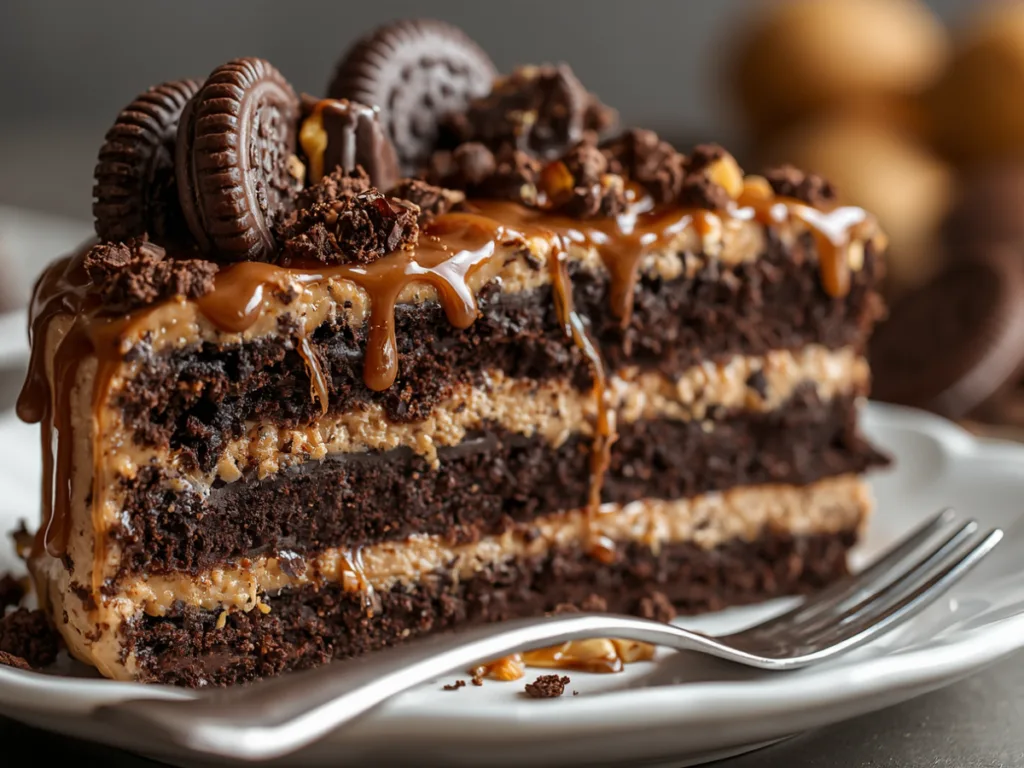
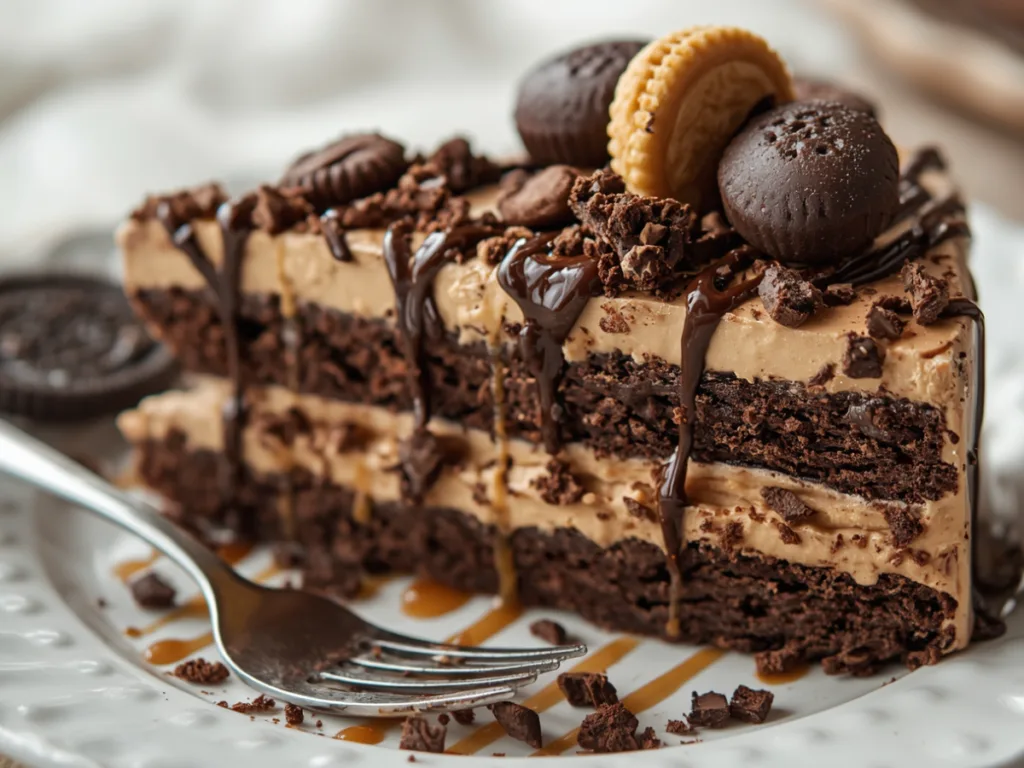
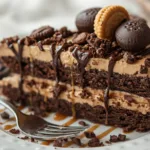
The peanut butter icebox cake is a vintage-inspired dessert that has seen a massive resurgence in modern kitchens. Originally popularized in the 1920s and 30s as “refrigerator cakes,” these treats relied on the new convenience of the electric icebox. Our modern take on the peanut butter icebox cake elevates those humble beginnings with a rich, stabilized whipped cream base and a high-quality peanut butter swirl. The peanut butter icebox cake is characterized by its distinct “zebra” or stacked layers, which are revealed only once the cake is sliced. It is a visual and culinary delight that proves simplicity is often the ultimate sophistication in the world of sweets.
What Is This Recipe
At its core, a peanut butter icebox cake is a layered dessert consisting of three primary components: a structural element (crackers or cookies), a creamy element (peanut butter mousse), and a topping (often chocolate or crushed nuts). For this specific peanut butter icebox cake, we focus on the harmony between the salty notes of the peanut butter and the subtle honey sweetness of the graham crackers. Unlike a cheesecake, which can be heavy, the peanut butter icebox cake maintains a light, airy quality thanks to the incorporation of whipped topping or heavy cream. It is the perfect balance for those who want a decadent dessert without feeling weighed down.
Origins & Inspiration
The inspiration for this cake comes from the classic American diner culture where “pudding cakes” were a staple. We wanted to create a version that felt a bit more “grown-up” by intensifying the peanut flavor and ensuring the sweetness wasn’t overwhelming. By using a peanut butter icebox cake method, we honor the tradition of efficient, delicious home cooking that doesn’t sacrifice quality. This recipe has been refined through dozens of iterations to find the exact ratio of cream to peanut butter, ensuring that your peanut butter icebox cake holds its shape perfectly when served.
Why You’ll Love This Dish
You will love this peanut butter icebox cake because it is incredibly forgiving. If your layers aren’t perfectly straight, it doesn’t matter; once it sets and is topped with chocolate ganache or extra peanut butter drizzle, it looks rustic and inviting. This cake is also incredibly versatile. While we use graham crackers, you can experiment with chocolate wafers to change the vibe completely. Furthermore, the peanut butter icebox cake is a fantastic way to involve kids in the kitchen since there is no heat involved, just fun assembly and waiting for the magic to happen in the fridge.
Ingredients & Notes
- Graham Crackers: You will need approximately 15–18 full sheets. These provide the “cake” structure.
- Cream Cheese: 8 oz, softened to room temperature. This adds tang and stability to the filling.
- Creamy Peanut Butter: 1.5 cups. Avoid the “natural” stir-style versions for this recipe as they can be too oily.
- Powdered Sugar: 1 cup, sifted to ensure a smooth texture in the mousse.
- Whipped Topping or Heavy Cream: 12 oz. If using heavy cream, whip to stiff peaks with a little vanilla.
- Milk: 1/2 cup (optional, for dipping crackers if you want an extra soft cake).
- Vanilla Extract: 1 teaspoon for aromatics.
- Chocolate Chips: For the topping (melted with a bit of cream for a ganache).
- Peanut Butter Chips: For an extra garnish and crunch.
Step-by-Step Instructions
- Prepare the Filling: In a large mixing bowl, beat the softened cream cheese and creamy peanut butter together until completely smooth. Gradually add the powdered sugar and vanilla, continuing to mix until well combined.
- Fold in the Cream: Gently fold in the whipped topping (or whipped heavy cream) using a spatula. You want to maintain the airiness, so do not over-mix. The resulting mixture should be a light, fluffy peanut butter mousse.
- Start Layering: In a 9×13 inch baking dish, spread a very thin layer of the peanut butter mixture on the bottom to act as “glue.” Arrange a single layer of graham crackers over the base, breaking some if necessary to fit the corners.
- Build the Cake: Spread about one-third of the remaining peanut butter filling over the crackers, smoothing it to the edges. Repeat the layers: crackers, filling, crackers, filling. You should aim for three full layers of crackers and filling.
- Add the Topping: Melt chocolate chips with a tablespoon of cream or coconut oil and drizzle generously over the top. Sprinkle with extra peanut butter chips or crushed graham crackers for visual appeal.
- The Chill Phase: This is the most important step. Cover the dish tightly and refrigerate for at least 8 hours, though 24 hours is ideal. This allows the crackers to soften into the perfect peanut butter icebox cake texture.
Pro Tips for Perfect Results
To ensure your cake is a total success, always use room temperature cream cheese. If the cream cheese is cold, you will end up with tiny lumps in your filling that are impossible to smooth out later. Another tip for the best peanut butter icebox cake is to use a high-quality offset spatula for spreading the layers; this gives you much better control than a spoon. If you want a deeper flavor, try lightly toasting your graham crackers in the oven for 5 minutes before assembling the cake, though this is entirely optional. Lastly, always wipe your knife with a warm, damp cloth between slices to get those professional-looking layers in every serving.
Variations & Ingredient Swaps
If you want to put a spin on the classic peanut butter icebox cake, try using chocolate graham crackers instead of honey ones. This creates a “darker” flavor profile that mimics a giant peanut butter cup. For a gluten-free cake, simply swap the standard crackers for your favorite gluten-free brand; they work just as well in absorbing the moisture. You can also add a layer of sliced bananas between the peanut butter filling for a “Fat Elvis” style peanut butter icebox cake that adds a fruity freshness to the rich dessert.
Ingredient Spotlight
The star of the show in this cake is undoubtedly the peanut butter. We recommend using a standard commercial brand like Jif or Skippy for this specific recipe. While we love artisan peanut butters, the stabilizers in commercial brands help the peanut butter icebox cake maintain its structure and prevent the oil from separating during the long chill time. The salt content in these brands also perfectly balances the powdered sugar, ensuring your cake isn’t cloyingly sweet but rather a complex blend of flavors.
Serving & Plating Ideas
When it comes to serving your cake, less is often more. A clean square of the cake looks beautiful on a white plate, perhaps with a small dollop of extra whipped cream on the side. For a more rustic look, you can serve the cake directly from the dish, but for a dinner party, consider freezing the cake for 30 minutes before slicing to ensure the cleanest possible edges. A drizzle of warm peanut butter over the top right before serving adds a lovely temperature contrast to the cold cake.
Best Side Dishes
While a peanut butter icebox cake is a standalone star, it pairs beautifully with salty snacks. A side bowl of pretzels or roasted peanuts can provide a nice crunch to accompany the soft texture of the cake. If you are serving this at a summer BBQ, a fruit salad with acidic fruits like strawberries or raspberries can help cut through the richness of the peanut butter icebox cake. The contrast between the creamy peanut butter and the bright fruit is always a hit.
Drink Pairings
To accompany your peanut butter icebox cake, consider a cold glass of milk—the classic pairing. For coffee lovers, a dark roast or an espresso provides a bitter counterpoint that balances the sweetness of the peanut butter icebox cake beautifully. If you prefer tea, a strong black tea or a chai with warm spices like cinnamon and cardamom complements the peanut flavors without overpowering them. Since this cake is a cold dessert, iced coffee is also a fantastic choice for a cohesive experience.
Storage & Make-Ahead Guide
The peanut butter icebox cake is the ultimate make-ahead dessert. It must stay in the refrigerator for at least 8 hours to reach the right consistency, but it remains delicious for up to 4 or 5 days when stored in an airtight container. If you have leftovers, you can actually freeze individual slices of the peanut butter icebox cake. Wrap them tightly in plastic wrap and then foil; they make for a delicious frozen treat that tastes like a premium ice cream bar. To serve from the freezer, let the peanut butter icebox cake sit at room temperature for about 10 minutes to soften slightly.
Budget Cooking Tips
Making this cake is very budget-friendly. Most of the cost comes from the peanut butter and cream cheese, which are often on sale. To save even more, buy store-brand graham crackers and whipped topping; in a layered dessert like this, the difference in taste is negligible. You can also make your own whipped cream from heavy cream if it’s cheaper than pre-made whipped topping, which often gives the peanut butter icebox cake a richer, more “from-scratch” feel for just a few cents more.
Cooking for a Crowd
If you are scaling up this peanut butter icebox cake for a large party, you can easily double the recipe and use two 9×13 pans or one large catering-size tray. Because the peanut butter icebox cake is so rich, you can cut the pieces smaller than you would a traditional sponge cake. A single 9×13 pan can easily yield 15–20 servings. The stability of the peanut butter icebox cake also makes it great for transport; just keep it in a cooler if you have a long drive to the potluck.
Weeknight Cooking Plan
While usually reserved for weekends, you can prep a peanut butter icebox cake on a Tuesday night in just 15 minutes. Let it sit in the fridge Wednesday, and by Thursday dinner, you have a spectacular dessert ready to go with zero effort on the day of. This “low-touch” approach makes the peanut butter icebox cake a savior for busy families who still want a homemade treat.
Family-Friendly Adaptations
Kids absolutely love helping with a peanut butter icebox cake. Let them be in charge of laying down the graham crackers—it’s like a delicious game of Tetris. To make it even more kid-friendly, you can top the peanut butter icebox cake with colorful chocolate candies or mini marshmallows. It’s a great way to build confidence in the kitchen without the dangers of a hot oven.
Troubleshooting Guide
Is your peanut butter icebox cake too soft? It likely didn’t chill long enough. Ensure you give it the full 8 hours. If the crackers are still crunchy, the filling might have been too thick; next time, try dipping the crackers quickly in milk before layering. If the filling is runny, ensure you didn’t over-beat the whipped cream when folding it in. Most issues with a peanut butter icebox cake can be fixed with more chilling time or a clever topping to hide any visual imperfections.
Seasonal Context
While perfect for summer because it is a no-bake treat, the peanut butter icebox cake is a year-round winner. In the autumn, a dash of cinnamon in the peanut butter mixture adds a cozy warmth. In the winter, serving it with a hot chocolate sauce makes it feel like a decadent comfort food.
Frequently Asked Questions
Can I make peanut butter icebox cake without cream cheese? Yes, you can substitute the cream cheese with more whipped cream or a thick Greek yogurt, though the peanut butter icebox cake will be less stable and slightly more tart.
How long does peanut butter icebox cake last in the fridge? A peanut butter icebox cake will stay fresh and delicious for 4 to 5 days, though the crackers will continue to soften the longer it sits.
Can I use chunky peanut butter in my peanut butter icebox cake? Absolutely! Using chunky peanut butter adds a great textural contrast to the smooth layers of the peanut butter icebox cake.
Is peanut butter icebox cake frozen? No, it is a refrigerated dessert. While it can be frozen, a traditional peanut butter icebox cake is served cold from the fridge to maintain its cake-like texture.
Can I use something other than graham crackers? Yes, Nilla wafers, chocolate wafers, or even digestive biscuits work beautifully in a peanut butter icebox cake.
Why did my peanut butter icebox cake get soggy? An icebox cake is supposed to be soft, but if it’s falling apart, it might be due to too much moisture in the filling or keeping it out of the fridge for too long before serving.
Love this recipe? Discover even more!
Explore my Pinterest boards for a world of delicious recipes, fresh ideas, and inspiring flavors. Click here and start pinning your next favorite dish! ➜https://www.pinterest.com/ElitesRecipes/
PrintPeanut Butter Icebox Cake
A decadent, no-bake dessert featuring layers of graham crackers and a fluffy peanut butter mousse that sets into a cake-like texture overnight.
- Prep Time: 15 mins
- Cook Time: 0 mins
- Total Time: 8 hrs 15 mins
- Yield: 15 servings
- Category: Dessert
- Method: No-Bake
- Cuisine: American
- Diet: Vegetarian
Ingredients
15–18 Graham Cracker sheets
8 oz Cream Cheese, softened
1.5 cups Creamy Peanut Butter
1 cup Powdered Sugar, sifted
12 oz Whipped Topping or whipped heavy cream
1 tsp Vanilla Extract
1/2 cup Chocolate Chips (for topping)
2 tbsp Peanut Butter Chips (optional garnish)
Instructions
1.In a large bowl, beat softened cream cheese and peanut butter until completely smooth.
2.Gradually mix in powdered sugar and vanilla extract until well combined.
3.Gently fold in the whipped topping with a spatula until the mixture is light and fluffy.
4.In a 9×13 dish, place a layer of graham crackers, breaking them to fit the edges.
5.Spread 1/3 of the peanut butter mixture over the crackers and repeat layers twice more.
6.Top with melted chocolate drizzle and peanut butter chips, then refrigerate for at least 8 hours.
Notes
Use room temperature cream cheese to avoid lumps.
Chill for a full 24 hours for the best ‘cake’ texture.
Wipe your knife with a warm cloth between slices for clean edges.