
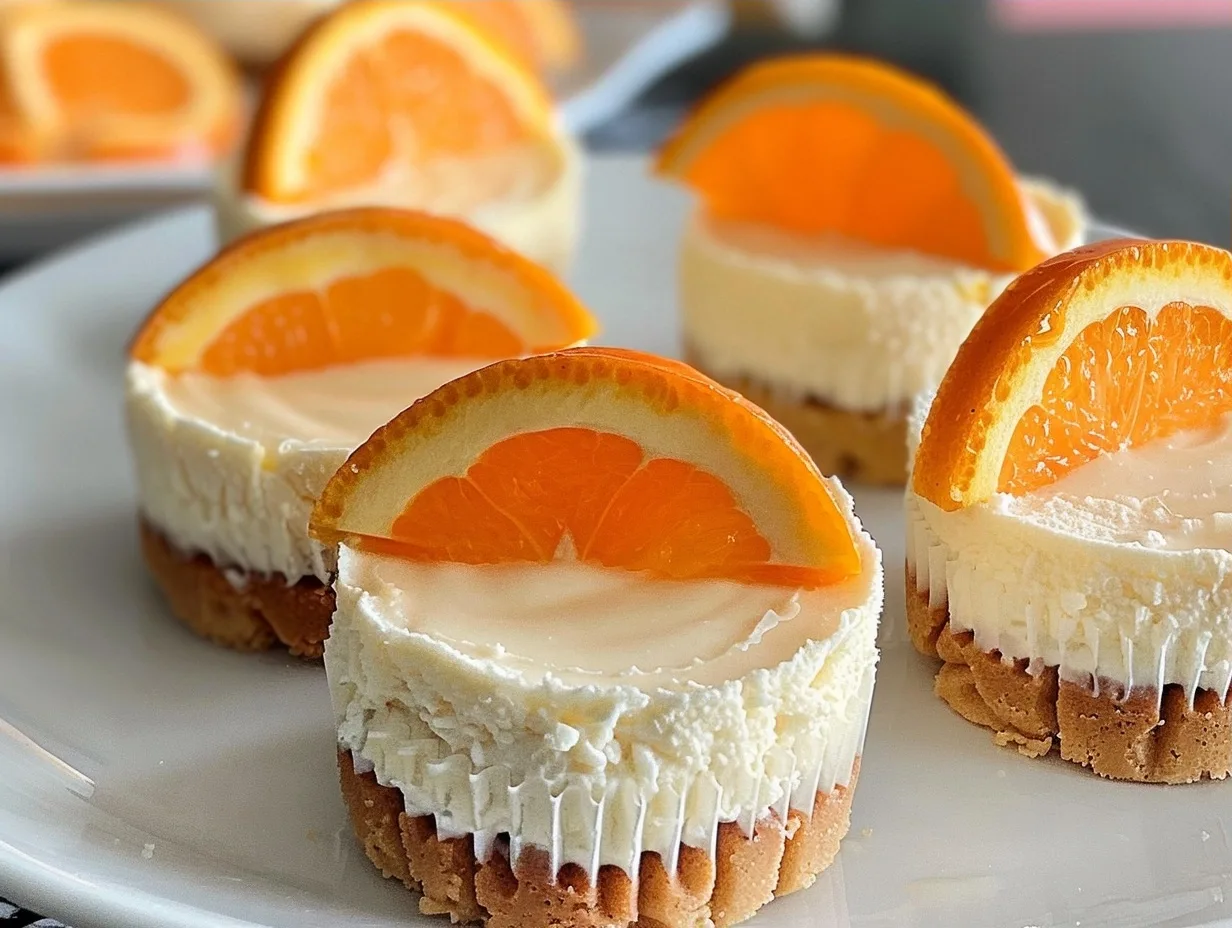
Orange creamsicle mini cheesecakes are decadent individual desserts that combine creamy vanilla cheesecake with vibrant citrus notes and a chocolate crust. These handheld treats offer a sophisticated balance of textures and bright flavors, making them an ideal choice for any gathering or special dessert occasion. The contrasting layers create a beautiful visual appeal that delights guests while satisfying those intense cravings for a classic nostalgic flavor profile.
Recipe Overview
| Prep Time | Cook Time | Total Time | Servings | Difficulty | Cuisine |
|---|---|---|---|---|---|
| 20 minutes | 0 minutes | 4 hours | 12 cheesecakes | Easy | American |
Why This Recipe Works
This recipe works because it leverages the natural brightness of fresh orange zest against the richness of a cream cheese base. By using a two-tone layering technique, the visual presentation mimics a classic frozen treat, elevating it from a simple bite to a professional-looking dessert.
I personally rely on this recipe for summer parties because it requires zero baking time, leaving my oven free for other dishes. The Oreo crust adds a necessary crunch that grounds the airy cream cheese filling, ensuring every bite contains a perfect harmony of chocolate and citrus notes.
Ingredients
| Quantity | Ingredient | Notes |
|---|---|---|
| 12 | Oreo Cookies | Use regular chocolate Oreos |
| 16 oz | Cream Cheese | Must be softened to room temperature |
| 1/2 cup | Powdered Sugar | Sift to avoid lumps |
| 1 tsp | Vanilla Extract | Pure extract provides best depth |
| 1 cup | Heavy Whipping Cream | Keep very cold before whipping |
| 1 whole | Orange | Use zest of one fresh orange |
| 1/2 tsp | Orange Extract | Do not skip for authentic flavor |
| 2-3 drops | Orange Gel Food Coloring | Adjust for desired vibrancy |
Step-by-Step Instructions
Crust Preparation
- Place 12 cupcake liners into a muffin tin to create stable molds.
- Position one whole Oreo cookie at the bottom of each cupcake liner to serve as the base.
Filling Development
- Combine softened cream cheese and powdered sugar in a medium bowl until the texture is smooth.
- Whip the heavy whipping cream in a separate chilled bowl until soft peaks form.
- Add orange extract to the whipped cream and continue beating until stiff peaks are achieved.
- Fold the cream cheese mixture into the whipped cream on low speed until just combined.
Layering and Setting
- Divide the final mixture into two equal portions in separate bowls.
- Spread the first half of the plain cheesecake mixture over each Oreo cookie base.
- Add the orange zest and orange gel food coloring to the second bowl of mixture and stir until uniform.
- Spread the orange mixture on top of the plain layer.
- Use a toothpick to create a gentle swirl pattern throughout the two layers for visual depth.
- Refrigerate the muffin tin for at least 3 to 4 hours, though overnight setting is superior.
- Garnish with whipped cream and fresh orange slices immediately before serving.
Chef Tips for Perfect Results
- Ensure cream cheese reaches room temperature before mixing to prevent unwanted lumps in your filling.
- Use chilled equipment for whipping your heavy cream to ensure it holds a stable structure.
- Add the orange gel color slowly, as a little goes a long way toward achieving that perfect sunset hue.
- Place the finished cheesecakes in the back of the refrigerator to avoid temperature fluctuations from the door.
Common Mistakes to Avoid
- Over-beating the cream cheese and cream mixture leads to a grainy texture. Mix only until combined to maintain a velvety mouthfeel.
- Using cold cream cheese creates clumps that are impossible to smooth out. Always pull your dairy out at least 60 minutes before starting.
- Skipping the orange extract results in a weak flavor profile. The zest provides aroma, but the extract provides the actual taste.
- Rushing the chilling process causes the cakes to fall apart when removing the liners. Patience in the fridge is essential.
Variations and Substitutions
| Ingredient | Substitution | Flavor Impact |
|---|---|---|
| Oreo Cookies | Golden Oreos | Adds a sweeter vanilla profile |
| Orange Extract | Lemon Extract | Changes the profile to a citrus tart |
| Heavy Cream | Coconut Cream | Adds a tropical dimension to the flavor |
Storage and Reheating
| Method | Duration | Instructions |
|---|---|---|
| Fridge | 3 Days | Keep in an airtight container |
| Freezer | 2 Weeks | Freeze without garnish, thaw in fridge |
Frequently Asked Questions
Can I use low-fat cream cheese for this recipe?
Avoid using low-fat cream cheese because it lacks the necessary density to set properly without gelatin. Use full-fat brick-style cream cheese to ensure your mini cheesecakes remain firm and creamy.
How do I know when the cheesecakes are fully set?
The cheesecakes are set when the tops feel firm to the touch and the edges pull slightly away from the liner. Always verify the center has solidified before attempting to remove the paper liners.
Can I prepare these mini cheesecakes one day in advance?
Prepare these treats up to 24 hours in advance for the best texture and flavor development. Keep them covered in the refrigerator to prevent the cheesecake from absorbing other odors.
What is the best way to remove the wrappers?
Peel the paper liners away carefully once the cheesecakes have chilled for the full duration. If they stick, place the tin in the freezer for ten minutes to firm the edges.
Is it necessary to add food coloring to the filling?
The orange gel food coloring is optional but recommended for the classic creamsicle aesthetic. If you prefer to omit it, the taste remains delicious even if the color is lighter.
Conclusion
These orange creamsicle mini cheesecakes represent the perfect balance between simple preparation and sophisticated presentation. By following these steps, you create a treat that balances the richness of cream cheese with the zest of fresh oranges. Embrace this recipe for your next event and enjoy the vibrant, nostalgic citrus flavors in every single bite. Store them properly, and you will have a ready-to-serve dessert that impresses every time.
PrintOrange Creamsicle Mini Cheesecakes
These delightful mini cheesecakes offer a nostalgic creamsicle experience in a convenient, handheld format. Featuring a crisp chocolate Oreo base topped with a silky-smooth, citrus-infused cream cheese filling, these treats strike a perfect balance between sweet vanilla and vibrant orange notes. Requiring no oven, they are the ideal sophisticated dessert for summer gatherings, dinner parties, or any occasion calling for a refreshing, visually stunning finish that is sure to impress your guests.
- Prep Time: 20
- Total Time: 260
- Yield: 12 cheesecakes
- Category: All Recipes
- Method: No-Bake
- Cuisine: American
- Diet: Vegetarian
Ingredients
12 Oreo cookies
16 oz cream cheese, softened
1/2 cup powdered sugar, sifted
1 tsp vanilla extract
1 cup heavy whipping cream, chilled
1 whole orange (zest only)
1/2 tsp orange extract
2-3 drops orange gel food coloring
Instructions
Place 12 cupcake liners into a muffin tin to create stable molds.
Position one whole Oreo cookie at the bottom of each cupcake liner to serve as the base.
Combine softened cream cheese and powdered sugar in a medium bowl until the texture is smooth.
Whip the heavy whipping cream in a separate chilled bowl until soft peaks form.
Add orange extract to the whipped cream and continue beating until stiff peaks are achieved.
Fold the cream cheese mixture into the whipped cream on low speed until just combined.
Divide the mixture into two portions, adding orange zest and food coloring to one half to create the two-tone effect.
Pipe or spoon the mixture into the liners over the Oreo crusts.
Refrigerate for at least 4 hours to set before serving.
Notes
Ensure the cream cheese is at room temperature to avoid lumps in the batter. For the best presentation, use a piping bag to swirl the two-tone colors. Store in the refrigerator for up to 3 days. These can be topped with extra orange zest or a dollop of whipped cream before serving.